Introduction
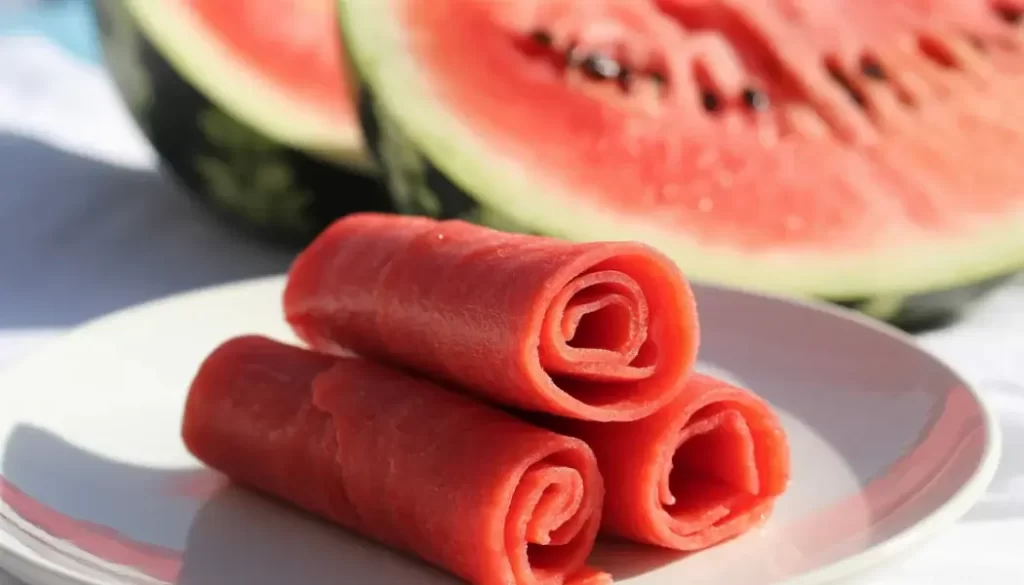
These homemade fruit roll ups are made with just one ingredient—fresh watermelon! If you’re looking for a healthy fruit snack or a fun way to make your own watermelon candy, this fruit roll up recipe is perfect. Unlike store-bought fruit roll ups, these contain no added sugar, no preservatives, and all the natural fruity flavor kids and adults love.
The Story Behind It
Fruit leather has been enjoyed for centuries, with origins in traditional Middle Eastern and Asian cultures where fruit was pureed and dried under the sun. Today, this age-old preservation method is getting a fun, nutritious upgrade in our kitchens. With watermelon’s natural sweetness and vibrant color, it becomes the perfect summer base for chewy, kid-friendly snacks.
Why You’ll Love It
🍉 Made with just one or two ingredients
🌞 Naturally sweet, no refined sugar
📦 Perfect for lunchboxes, hiking, or healthy snacking
👩🍳 A fun project for kids and adults alike
Watermelon Fruit Roll-Ups Recipe
Ingredients
- 4 cups cubed seedless watermelon
- Optional: 1–2 teaspoons lemon juice (for brightness and preservation)
Instructions
- Preheat the Oven
Set your oven to 170°F (or the lowest possible setting). Line a large baking sheet with a silicone mat or parchment paper. - Blend
In a blender, puree the watermelon until completely smooth. Add lemon juice if desired. - Strain (Optional)
If you want a smoother roll-up, strain the puree through a fine mesh sieve to remove excess pulp. Totally optional! - Pour & Spread
Pour the puree onto the prepared baking sheet and spread it into a thin, even layer (about 1/8 inch thick). - Bake
Bake for 3–5 hours, or until the puree is no longer sticky and peels away easily from the mat. The time depends on your oven and the thickness of the puree. - Cool & Slice
Let it cool completely. Peel off the mat and use scissors or a pizza cutter to slice into strips. Roll them up with parchment paper if storing.
Tips & Variations
🍓 Add strawberries for a flavor boost
🌿 Try mint or basil for a herbal twist
🌶️ Add a pinch of chili powder for a spicy version
🍯 Swirl in a little honey for extra sweetness (though it’s sweet enough on its own!)
Final Thoughts
Making your own fruit roll-ups is easier than you think—and way healthier than store-bought versions. With just watermelon and a little patience, you’ll have chewy, fruity goodness you can feel great about.

🍉 Watermelon Fruit Roll-Ups (Homemade Magic!)
Ingredients
Method
- Preheat Oven: Set your oven to 170°F (or lowest setting). Line a baking sheet with parchment paper or a silicone mat.
- Blend: In a blender or food processor, purée the watermelon until smooth. Add lemon juice and optional sweetener, then blend again.
- Strain (Optional): For smoother texture, strain through a fine mesh sieve to remove pulp.
- Spread: Pour mixture onto the lined baking sheet and spread evenly into a thin layer, about 1/8-inch thick.
- Dry: Bake for 4–6 hours until the purée is dry but still slightly tacky. It should peel off easily from the sheet.
- Cut & Roll: Let cool, then cut into strips and roll with parchment or wax paper.
Notes
You love watermelon then you have to check :
Watermelon fruit roll ups can last up to 1–2 weeks when stored in an airtight container at room temperature. For longer shelf life, you can refrigerate them for up to a month or freeze them for up to 3 months.
Absolutely. You can easily make fruit roll ups without a dehydrator by using a standard oven. Simply puree your fruit, spread it thin on a lined baking sheet, and bake at a low temperature (around 140–170°F or 60–75°C) until it’s dried and flexible.
Yes! Homemade fruit roll ups are a healthier alternative to store-bought ones because they contain no added sugar, no artificial colors, and no preservatives. When made with whole fruits like watermelon, they retain fiber and essential nutrients, making them a smart healthy fruit snack for both kids and adults.
Fruit roll ups are typically made from pureed fruit that’s spread thin and dried until it becomes chewy. Store-bought versions often include added sugars, artificial flavors, and preservatives. However, homemade fruit roll ups can be made with just real fruit—like watermelon—for a natural and healthier treat.
Sure! Just thaw it before blending and remove excess water if necessary.
Yes! Set it to 135°F and dehydrate for 6–8 hours or until no longer sticky.
Wrap in parchment and keep in an airtight container for up to 2 weeks. For longer storage, refrigerate or freeze.